
Logging is provided by logstash and Kibana, backed by ElasticSearch.
What logging includes out of the box
Configuration for Nginx access log, Ruby on Rails JSON based logs.
Both of these are configured to be shipped to the server remotely by Rsyslog shipping (agent configuration included as well).
Credentials Configuration
AWS Credentials
Lots of cookbooks rely on chef "knowing" your AWS access keys.
Right now, this is handled by an encrypted data bag. There are far better ways to handle secrets with chef but for simplicity an easier adoption an encrypted data bag is chosen here.
First, lets create our secret key (Make sure you do not check this file in to source control).
$ openssl rand -base64 512 | tr -d '\r\n' > .chef/encryption_key
Edit knife.rb in .chef directory to include this line
knife[:secret_file] = "#{cwd}/encryption_key"
Now, using this key, we will create en encrypted data bag
$ bin/knife data bag create aws main --secret-file .chef/encryption_key
This will open your default editor with a JSON that looks like this
{
  "id": "main"
}
You need to add your AWS keys this way:
{
  "id": "main"
  "aws_access_key_id": "YOUR_ACCESS_KEY",
  "aws_secret_access_key": "YOUR_SECRET_KEY"
}
Verify that the data bag is encrypted
$ bin/knife data bag show aws main
This should output something similar to this
WARNING: Encrypted data bag detected, but no secret provided for decoding.  Displaying encrypted data.
aws_access_key_id:
  cipher:         aes-256-cbc
  encrypted_data: STYb5AdscZfyRidV/BVNjCkfeWNeECG+ZHFdemDbAg/aAuTHck+PgUSycWdw
  A7Iz

  iv:             epQltD8GbLbnB9VmUvYMLw==

  version:        1
aws_secret_access_key:
  cipher:         aes-256-cbc
  encrypted_data: u1V/APx3lhjNWlU2/VjrF3OfL4Q4sfU3XKHRBuoIC8P7Y6utTD0y7qDu7GjI
  SVM3Bm/t+3kijGTmENhZ0SWFVw==

  iv:             DFqi5fSOEoB7gik90WcuUg==

  version:        1
id:                    main
Kibana Credentials
By default, Kibana is protected by HTTP basic auth with username and password.
Create an encrypted data bag for this as well
$ bin/knife data bag create kibana credentials --secret-file .chef/encryption_key
The keys you need to add are user and password like so
{
  "id": "credentials",
  "user": "USERNAME",
  "password": "PASSWORD"
}
Cookbook configuration
All of the configuration of this cookbook outside of the credentials are stored in the attributes file
Navigate to site-cookbooks/stack-logger/attributes/default.rb
Disk configuration
default['logger']['disk_count']  = 5
default['logger']['disk_size']   = 1025
default['logger']['raid_level']  = 10
default['logger']['disk_piops']  = 3000
default['logger']['mount_point'] = '/mnt'
The logger cookbook will install a 5TB disk with 3000iops, than mount it to
/mnt.
Those settings are highly recommended for production since it will acoomodate your needs loger term.
Configuration files
override['logstash']['instance']['server']['config_templates_cookbook'] = 'stack-logger'
override['logstash']['instance']['server']['config_templates']          = {
  'syslog' => 'config/syslog_config.conf.erb',
  'rails' => 'config/rails_config.conf.erb',
}
Logger comes with Nginx and Rails preconfigured. If you need others please use this setting and add your confgured files.
Nginx configuration
input {
  tcp {
    port => "5544"
    type => "syslog"
  }
}

output {
  elasticsearch {
    host => "127.0.0.1"
    # protocol => "http"
  }
}

filter {
  if [type] == 'syslog' {
    grok {
      match => {
        message => "%{COMBINEDAPACHELOG}"
        program => "nginx-access"
      }
    }
  }
}
Rails configuration
If you want your rails application to send logs over to logstash, first install logstasher gem in your application.
For additional information also read this post: http://avi.io/blog/2014/12/15/open-sourcing-the-way-we-centralize-logs-for-our-rails-applications
input {
  tcp {
    port => "5545"
    type => "rails"
    codec => json {
      charset => "UTF-8"
    }
  }
}

filter {
  if [type] == 'rails' {
    grok {
      pattern => "<%{POSINT:syslog_pri}>%{SYSLOGTIMESTAMP:timestamp} %{SYSLOGHOST:logsource} %{SYSLOGPROG}: %{GREEDYDATA:clean_message}"
    }
    mutate {
      remove => [ "message" ]
    }
    json {
            source => "clean_message"
    }
  }
}
Using this configuration you can duplicate and send logs from any application really.
Now that you configured everything, you can continue to adding and bootstrapping your server
Adding a server
With everything in the stack, we use terraform to plan and apply changes to the server list.
First, lets see what we are going to add here.
Navigate to terraform/logger and execute the following commands
$ export MY_IP=`curl -s checkip.dyndns.org | sed -e "s/.*Current IP Address://" -e "s/<.*$//"`">`
$ terraform get
$ terraform plan -var key_name=production -var your_ip_address=$MY_IP
If you did not complete the cluster creation (which is fine) described in BOOTSTRAPPING THE CLUSTER you should see something like this in the output.
+ aws_instance.logger
    ami:                        "" => "ami-7f675e4f"
    availability_zone:          "" => "<computed>"
    ebs_block_device.#:         "" => "<computed>"
    ephemeral_block_device.#:   "" => "<computed>"
    instance_type:              "" => "m4.large"
    key_name:                   "" => "production"
    placement_group:            "" => "<computed>"
    private_dns:                "" => "<computed>"
    private_ip:                 "" => "<computed>"
    public_dns:                 "" => "<computed>"
    public_ip:                  "" => "<computed>"
    root_block_device.#:        "" => "<computed>"
    security_groups.#:          "" => "3"
    security_groups.2558399475: "" => "logger"
    security_groups.3405273547: "" => "cluter"
    security_groups.856292532:  "" => "external_connection"
    source_dest_check:          "" => "1"
    subnet_id:                  "" => "<computed>"
    tags.#:                     "" => "1"
    tags.Name:                  "" => "mesos"
    tenancy:                    "" => "<computed>"
    user_data:                  "" => "d9a0fd5d2cd5e805f6ed6fc2b9bb06c5aa5693ca"
    vpc_security_group_ids.#:   "" => "<computed>"

+ aws_security_group.cluster
    description:                          "" => "Cluster Security Group"
    egress.#:                             "" => "1"
    egress.482069346.cidr_blocks.#:       "" => "1"
    egress.482069346.cidr_blocks.0:       "" => "0.0.0.0/0"
    egress.482069346.from_port:           "" => "0"
    egress.482069346.protocol:            "" => "-1"
    egress.482069346.security_groups.#:   "" => "0"
    egress.482069346.self:                "" => "0"
    egress.482069346.to_port:             "" => "0"
    ingress.#:                            "" => "1"
    ingress.3544538468.cidr_blocks.#:     "" => "0"
    ingress.3544538468.from_port:         "" => "0"
    ingress.3544538468.protocol:          "" => "tcp"
    ingress.3544538468.security_groups.#: "" => "0"
    ingress.3544538468.self:              "" => "1"
    ingress.3544538468.to_port:           "" => "65535"
    name:                                 "" => "cluter"
    owner_id:                             "" => "<computed>"
    vpc_id:                               "" => "<computed>"

+ aws_security_group.external_connections
    description:                          "" => "External Connections Security Group"
    egress.#:                             "" => "1"
    egress.482069346.cidr_blocks.#:       "" => "1"
    egress.482069346.cidr_blocks.0:       "" => "0.0.0.0/0"
    egress.482069346.from_port:           "" => "0"
    egress.482069346.protocol:            "" => "-1"
    egress.482069346.security_groups.#:   "" => "0"
    egress.482069346.self:                "" => "0"
    egress.482069346.to_port:             "" => "0"
    ingress.#:                            "" => "4"
    ingress.1529474654.cidr_blocks.#:     "" => "1"
    ingress.1529474654.cidr_blocks.0:     "" => "24.130.239.224/32"
    ingress.1529474654.from_port:         "" => "5050"
    ingress.1529474654.protocol:          "" => "tcp"
    ingress.1529474654.security_groups.#: "" => "0"
    ingress.1529474654.self:              "" => "0"
    ingress.1529474654.to_port:           "" => "5050"
    ingress.2214680975.cidr_blocks.#:     "" => "1"
    ingress.2214680975.cidr_blocks.0:     "" => "0.0.0.0/0"
    ingress.2214680975.from_port:         "" => "80"
    ingress.2214680975.protocol:          "" => "tcp"
    ingress.2214680975.security_groups.#: "" => "0"
    ingress.2214680975.self:              "" => "0"
    ingress.2214680975.to_port:           "" => "80"
    ingress.2617001939.cidr_blocks.#:     "" => "1"
    ingress.2617001939.cidr_blocks.0:     "" => "0.0.0.0/0"
    ingress.2617001939.from_port:         "" => "443"
    ingress.2617001939.protocol:          "" => "tcp"
    ingress.2617001939.security_groups.#: "" => "0"
    ingress.2617001939.self:              "" => "0"
    ingress.2617001939.to_port:           "" => "443"
    ingress.4178298166.cidr_blocks.#:     "" => "1"
    ingress.4178298166.cidr_blocks.0:     "" => "24.130.239.224/32"
    ingress.4178298166.from_port:         "" => "22"
    ingress.4178298166.protocol:          "" => "tcp"
    ingress.4178298166.security_groups.#: "" => "0"
    ingress.4178298166.self:              "" => "0"
    ingress.4178298166.to_port:           "" => "22"
    name:                                 "" => "external_connection"
    owner_id:                             "" => "<computed>"
    vpc_id:                               "" => "<computed>"
Once you apply the change, it will create the server and output the public IP, so lets do that now and create a logstash server.
terraform apply -var key_name=production -var your_ip_address=$MY_IP
This will output a public IP for the logger server, now we can bootstrap our logger with chef.
$ export SERVER_IP=THE_SERVER_IP_YOU_GOT_FROM_TERRAFORM
$ bin/knife bootstrap $SERVER_IP -r "role[base],role[logger]" -E production -x ubuntu --sudo
When chef is done, navigate to the URL (server IP or public DNS) and you should see this:
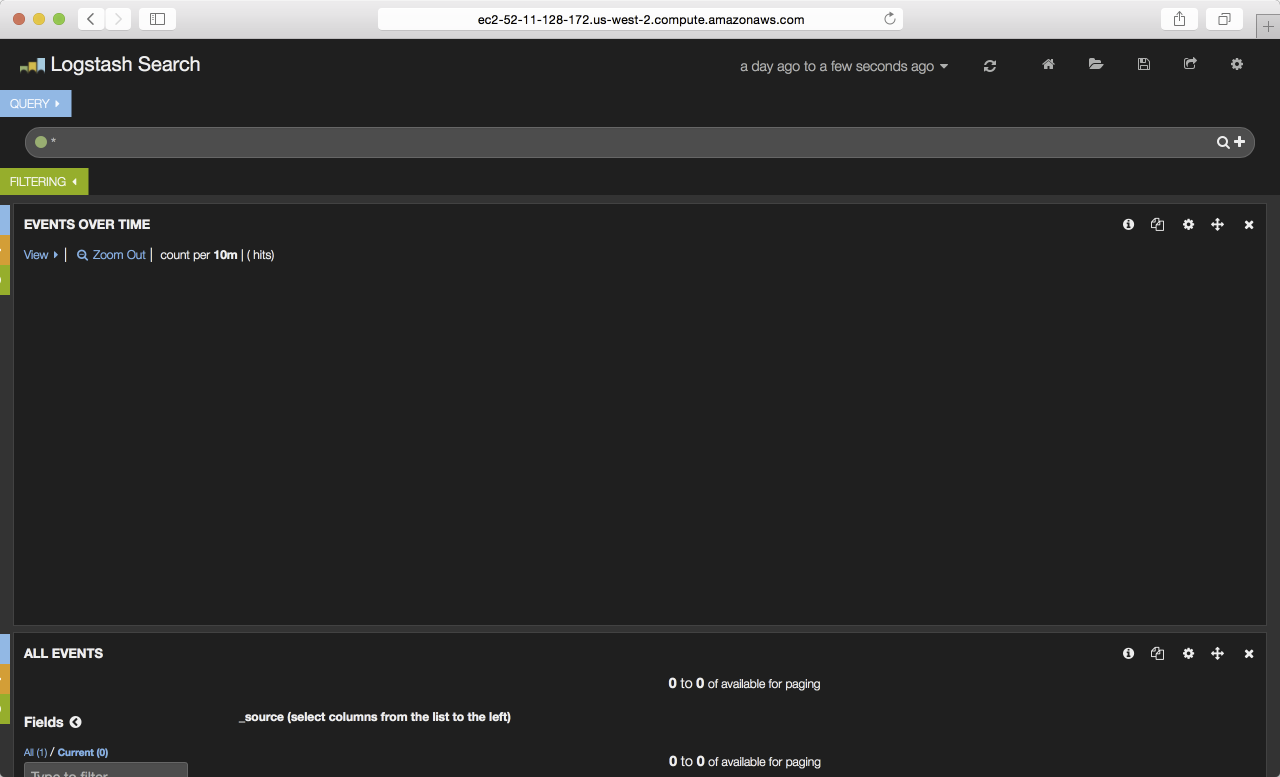
Congrats! You have a running server, you can already start shipping logs to this server, the firewall rules are preconfigured and everything runs smoothly.